Showing posts with label Terrain. Show all posts

Wednesday, 7 August 2013

Terrain Tutorial: Industrial Style Fencing

Another bit of relatively easy utility terrain. Great for blocking lines of advance (in some systems), creating storage areas, supply depots and even basketball courts.

You will need:
Superglue
Good Pair of Scissors
Sand
Milli-put
Fine Metal Mesh (I got my mine from the paper mache section of an art store. Car body mesh also works well).
Small, thin wooden sticks - toothpicks, coffee stirrers, anything like that.
Basing Materials - in my case I like to use cake trays, because they're good and thick and the foil-treated surface helps prevent the cardboard from warping.
Some of what you will need.
 Step One: Eat the cake. Yum Yum.
Cut the basing material into long thin strips about an inch wide. I've cut mine into 8 inch long strips because my mesh comes in eight inch sections, to save a bit of measuring. Once you've done that, place three blobs of milliput on the strip. One at each end and one in the middle. If you're using the cake tray, you'll need to superglue these down, otherwise the milliput won't take. Then cut you're wooden sticks to size (I like 75mm) and stick them into the milliput. Build up more milliput around the stick to help secure it in place. The sticks don't all have to be exactly the right length (or even straight) because the fence posts would subside over time.

After the first few steps you'll have something like this.
 Next, cut the wire-mesh. You want each strip to be as long as the base and as tall as the fence posts. In my case, that mean's 8inches long by 75mm high. Yes I'm mixing my measures here. I'm a child of the metric-changeover period. I work with both systems. Place more milliput lobs between the posts (remember that if you're using the cake tray you will need to glue them in place. Push the mesh down into all five blobs and use superglue to stick the mesh to the posts. You may find you need to use more miliput or blue tac to keep the wire stuck to the sticks long enough for the glue to dry.
More milli-put blobs added and mesh fence in place.

 Now you need to frame the mesh in place between the original posts and a second set of three posts. Again, secure them to the base using milli-put (and super-glue if using the cake tray). You'll often find the posts don't want to stay together and will branch out to form a V shape. Use milli-put and superglue to fix the top's of the two posts together.
Stick the two posts together with milli-put and super-glue.

 Remember to make a set of gates using two sets of four fence posts. I tend to make one gate base for every two or three bases of normal fencing.
Gates
Once you've assembled your fences, let the milli-put set over night before doing anything else.

Monday, 5 August 2013

Silo Build Part II -Painting

Part two of the silo terrain building article.

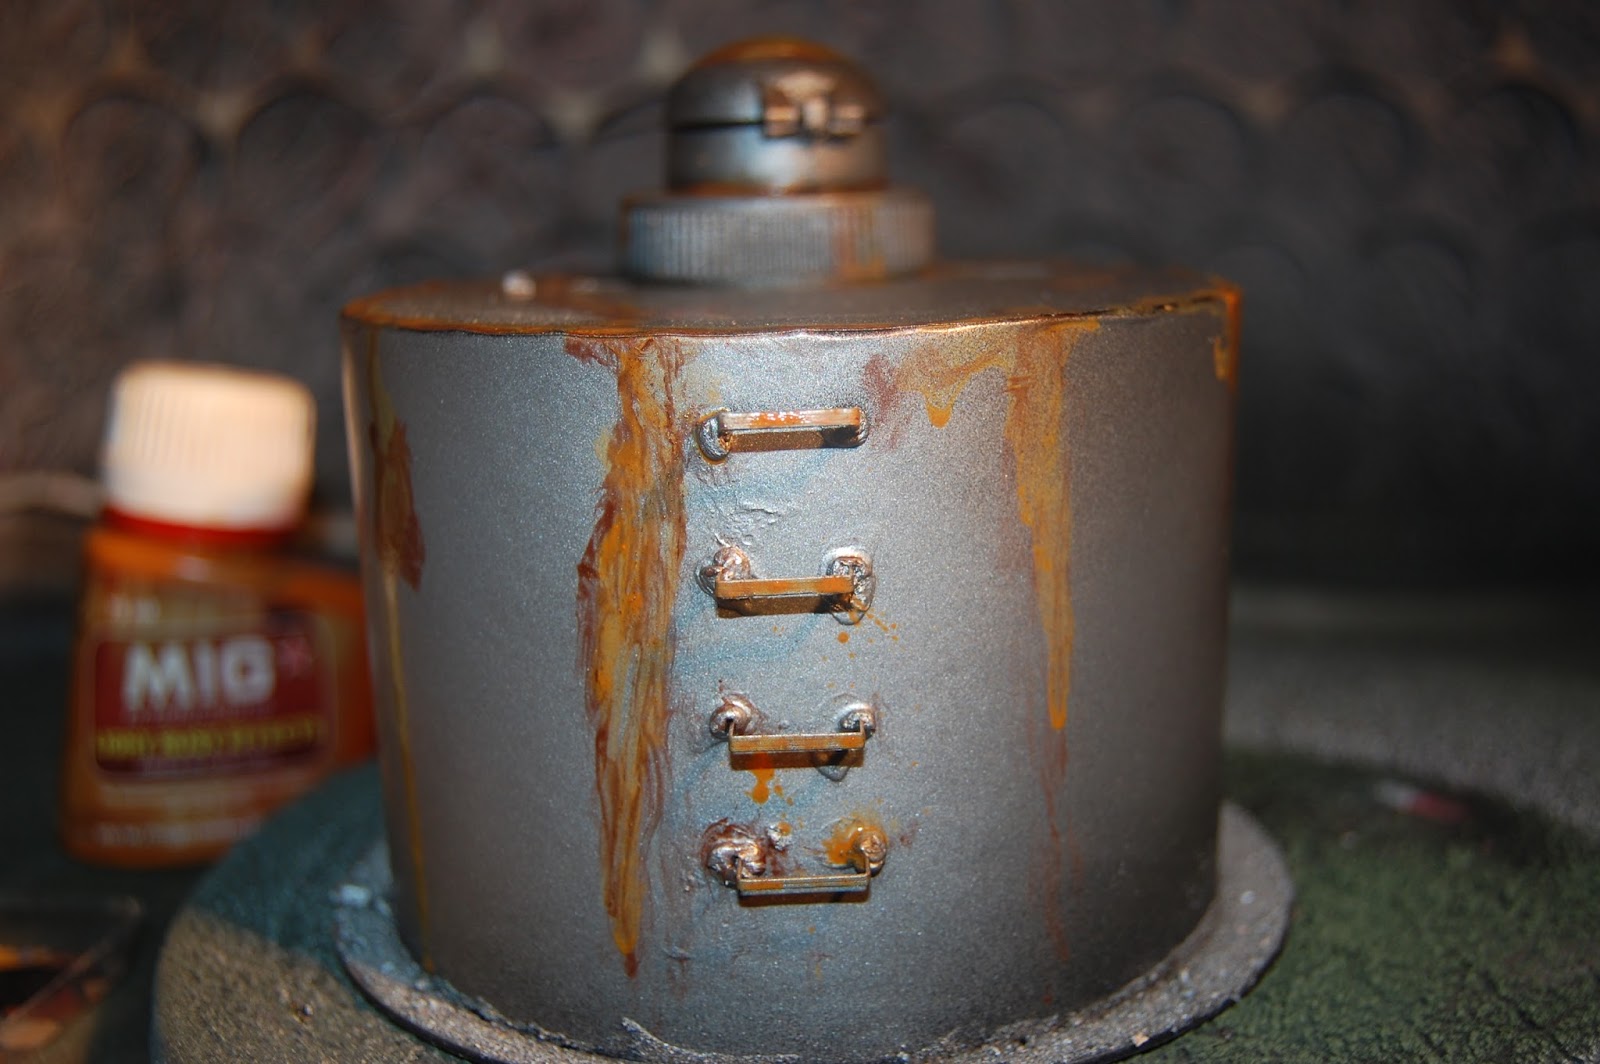
Taking a very old, stiff-bristled brush I half-stipled, half painted long streaks of Model Air Rust paint down the sides of the Silo and around the spot wields. If you don't have Model Air Rust, any dark brown/umber paint mixed with a metallic will do.

I did the same on the upper surface of the silo and around the rim, careful to make sure I applied the rust coloured paint anywhere water might collect in pools.

Taking Mig Light Rust Effects and using the same stiff brush I painted orange streaks over the rust-brown, being careful to leave the rust brown showing a the edges. If you don't have Mig Light Rust, then any bright orange paint will do the same trick. Just make sure to water it down to the consistency of ink first.

And again on the upper surface of the silo

At this point I did something stupid: I forgot to take a photo of the next stage. All I did was take some Games Workshop Armageddon Dust and, using my fingers, smudged it all the "clean", silver bits of the silo to represent years of dust storms and the like.

After adding the Armaggeddon dust, I overloaded my stiff-bristled, old brush with ink and, using painting down from the top of the silo to the bottom, applied it all over the silo, been careful to leave as many streaks and making the coverage as uneven as possible. 

With the Silo now looking like a rusty, abandoned piece of junk, I painted the base Vellejo Model Colour English Uniform and dryrbished with Vellajo Model Colour Green Ochre.

All Done. About 2 man-hours of work.

Sunday, 4 August 2013

Silo Build Part I


It's been a while since I knocked together any terrain to add to my collection. Inspired by a champagne truffle box, I decided it was time to add a storage silo my collection of 28mm Bad Landing/Post-Apocalypse scenery. I have a good number of storage silo's already, but they're better suited to 15mm scale or less. So it's time for me to fill this gaping hole in my scenery collection:

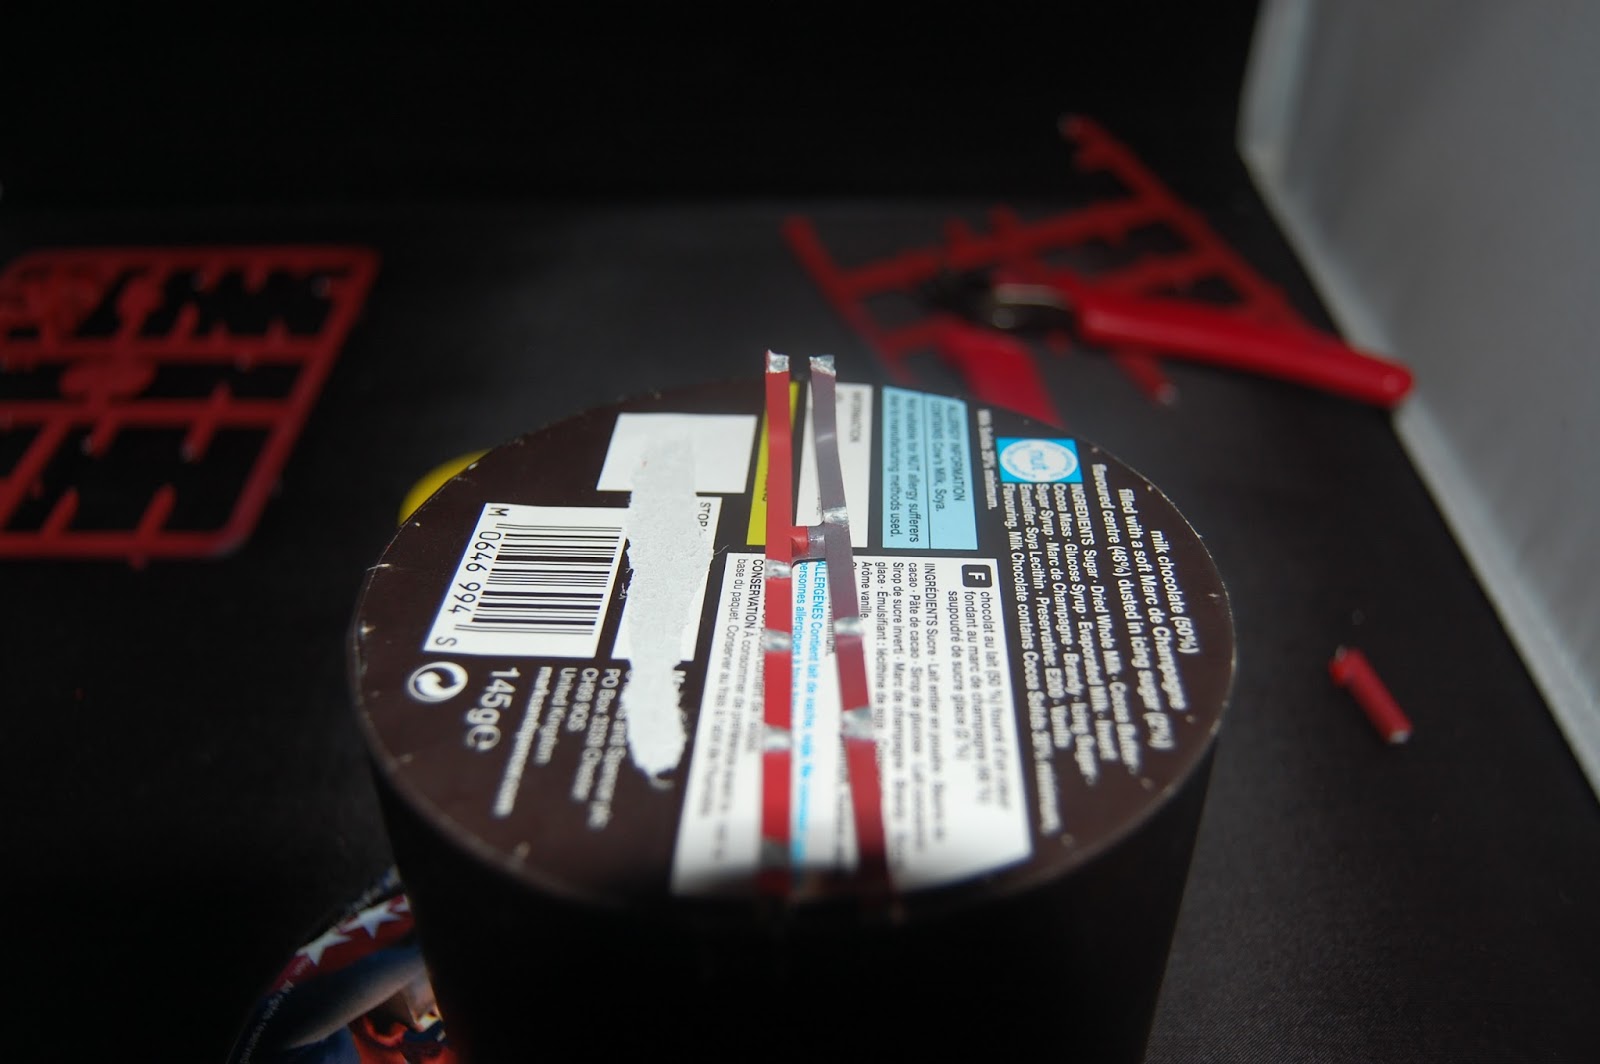
Parts: Sturdy round box, CD, Old Ink Pot Lid, Bottle Top, Old Spru's, Staples.

I first cut th sprus to length then glued them together, using the round "spacer" on the sprue as a spacer between the two "pipes".

Like this.

I super-glued the pipes to the side of the box, then glued the box to the CD.

I then super-glued the bottle top and ink pot lids in place to make a hatch. I made sure that the spru-pipes were flush with the bottle lid.

I used groups of three staples to make ladder rungs and super-flued them place. I used milli-put to make "spot weld" marks. The flock was glued to the base with PVA glue.
After spraying with a black undercoat, I lightly sprayed over the top with Army Painter Plate Mail Spray-Paint.


Tuesday, 19 March 2013

Wasteland Terrain

One of my big projects this year is to get back to building more Post Apoc terrain for my gaming table. It's a project I had to put on hiatus late last year when most of my gaming miniatures and scenery went into storage for six months in preparation for the move down to Kent. As well as using it for games of 40k (there's a reason most of my 40K stuff is based for desert play) I'll be using the terrain for Post Apoc games such as the new Rogue Trooper game from Mongoose as well my own home-brew rules (used to game everything from RIFTS to Fallout to Terminator).

As I'm catching up on a five-day backlog at work, my limited painting time for my own projects has become even more limited recently, which is perfect for terrain building. So I've started work on a very simple piece of terrain to add to my existing collection: a camp site.

Here's the planned layout. Once I've got the tents painted I'll start work on the base itself. I use Vellajo stone effect for my wasteland bases (in conjunction with builders gravel) but getting the stuff onto a base without smearing some over a miniature or a tent is fiddly at best. So I prefer to put the white stone effect on first and paint the base separately before sticking miniatures or terrain on top.

Very much a work in progress right now....

I'm also debating with the idea of leaving the tent's loose, for ease of storage and for a greater variety of layouts. We'll see.

Wednesday, 27 February 2013

Post Apoc Terrain from GW?

Well, not really. But the Warhammer walls set really does paint up well as part of the post apoc landscape. Despite my best efforts, I've not really managed to do much in the way of painting miniatures or terrain for post-apocalyptic gaming these last few weeks. Having to take some time off last week when the family came to visit was part of it, but mostly it comes down to just being far too busy. I've had to cut out my usual habit of painting my own stuff on my lunch breaks and simply skip lunch altogether (dearly beloved it not happy about this).

I did manage to snatch an hour or so on Sunday to finish the Warhammer Walls set, which has been languishing in it's undercoated state since October. It took no time at all really. Simple drybrushing for the most part, with the metal and rust effects painted on when all the drybrushing was over. Still, for such a rushed effort, I think they really look the part.


Wednesday, 22 August 2012

Review: Vinyl Maps from Signs on the Cheap

First, the disclaimer: SignsontheCheap.com approached me a week or two ago with the offer of creating a free vinyl map or similar gaming related item in return for a placing a review on my blogs. However, there was nothing in the deal that suggested this had to be a positive review.

But it's going to be pretty damn positive anyway. Just take a look at this:


Although I never thought to include anything for scale, what you're looking at here is a 3 high vinyl map of the Empire and Kislev from the Warhammer World. Despite the quite considerable magnification to go from the original image here:


...to the image printed on the vinyl, all the place names, rivers, mountains and other terrain features are clearly discernible and readable, with only minimal blurring. Someone more pedantic than myself might consider tidying up the place names with a permanent marker but there's really no need. The map is entirely readable even in quite dim light and frankly, looks pretty damn amazing too.

You'll notice that the image printed here is slightly truncated north-south when compared to the original image. That's because the guys at Signs on the Cheap noticed that the original file I downloaded from the web-site was corrupt, and had a band of randomly coloured pixels just south of where my map ends (you can see it on the original image if you look closely). They kindly suggested a number of options and we eventually decided simply to end the map just before the corrupt segment.

Delivery was extremely fast and proofs were emailed promptly only a day after I sent the map image. Anyone considering such a campaign map should certainly give signsonthecheap.com a good look.

I'm even considering trying to commission a proper vinyl battle-mat or two just to see how they turn out. I have a lot of old Classic Battletech hex-maps that I'd particularly like to see reproduced on a material considerably more durable than paper or cardboard. Watch this space and I'll let you know how I get on.


Wednesday, 21 March 2012

Quick Tomorrow's War Update

I haven't managed to squeeze in much time for working on my 15mm Tomorrow's War miniatures or scenery in the last month or so. But here's a few photographs of what I've managed to strike off the painting list.
15mm Colonial Police Anti-Tank section (Khurasan Neo-Sovs)


I still have about fifty 15mm Khurasan Neo-Sovs infantry and a dozen vehicles to paint, and a whole wad of scenery in need of completion. I imagine it'll be some time yet before their all completed.

Tuesday, 6 March 2012

Post Apocalypse: Aftermath Update

I've been busy with work, but I've still managed to keep this project going by snatching a few moments here and there while waiting for customer's orders to dry and by getting up a little earlier than normal.

First up, we have some painted denizens of Post-Crash earth.


This gorgeous young lass was named Lucine by (I think) Lucky Joe when I first posted her pics on the Lead Legion blog. She represents a member of the Wastelander faction - a mixture of PA settlers looking for a quiet life and the adventurous types that look out for them. Specifically, she's an Adventurer, the second most experienced (and expensive) type of Fighter in a Wastelander gang after the Hero.


This fella here doesn't have a name on the roster yet, but I plan on having two uses for him. You can't see it in the photo, but his left arm is synthetic. So hell see use as both a Wastelander hero and as a Bot Infiltrator in Aftermath play tests.


Young Spike here belongs to the Raider play test gang, and was it's first member to be painted. I haven't quite settled on a name for the type of fighter that fills the "Juve" spot on Raider gang rosters, but when I do I'll let you know. 


This here is his buddy, a typical Raider Thug. He has a passing resemblance to a certain actor whose name I don't recall (he was the hero in Battlefield Earth and the journalist in We Were Soldiers). Once I do, this miniature will have his official play-test name.


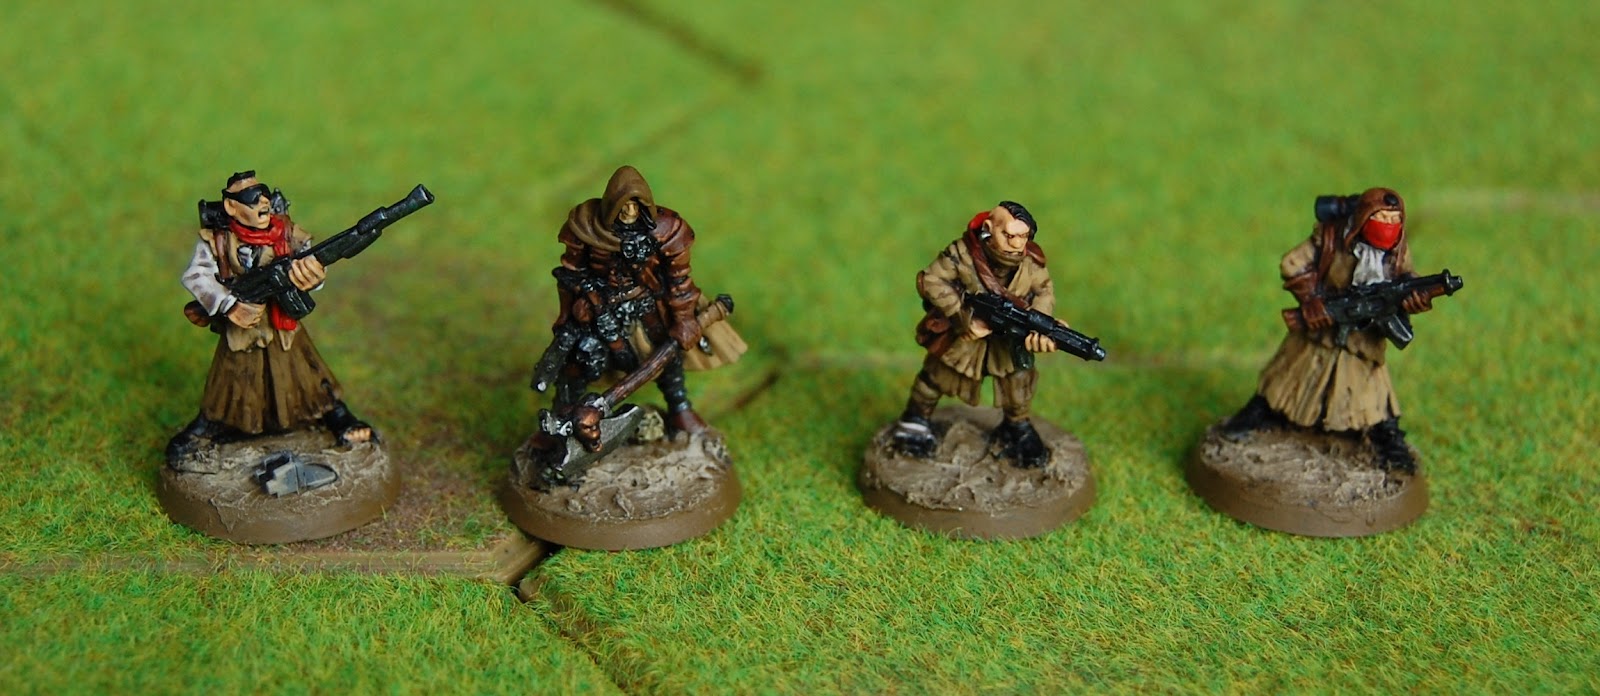
 This guys a Desperado, the leader of a Scavvie gang. Scavvie gangs don't tend to have much in the way of sophisticated gear as they have a hard time keeping energy weapons serviceable (the dust gets everywhere in the deep wastes). They make up for this with ferocity and cunning however. And (seemingly) really big axes too.


The Scavvie gang as it stands today. Scavvies are very cheap in terms of points, so I'll need a LOT more of these guys before I have a play-test worthy force.


TERRAIN
I haven't just been painting minis, I've been building terrain as well. A while back I posted about making modular building walls by using basing foam card on C.D's. I got about eight of them assembled before I remembered I had all this card terrain I bought on PDF years ago. Doh! I haven't abandoned the old CD idea altogether. The building bits I made will be painted up eventually, but for the time being I'm gonna concentrate on easier to make card buildings. Here's a work in progress. The round thing out front is a plant pot that some Scavvie has been using as a brazier.

Bloody scavvies.


Next up we have a Perry Miniatures North American Farm House I painted for Lead Legion Painting Service. As someone (Lucky Joe again?) pointed out, this building could be used in just about any genre from the 17th century onwards. It looks like it would be perfect for Post Apocalypse games. The chimney was left off so that the roof (which is supposed to be glued on) can be detached. This handy little set also came with white picket fencing. Also very useful for PA.


 Finally, we have my pride and joy. I call it the Battle Bus. I reckon this is an incredibly versatile piece of terrain. In one battle it's a roadblock, in another, a pill-box. In other, it's the gate to a Wasteland Fortress. Hell, it could even be used as a functioning vehicle. Looking at the graffiti, I hope you can see that I've tried to form a narrative about the life of this bus. It's gone from being the home of stranded survivors, to a Raider gang territory marker and now (finally) a danger sign warning about the mutant creatures that presumably wiped the gang out. It's my absolute favourite terrain piece. Even the huge and ugly mould line along the roof (made of such bad quality plastic that it actually shattered when I tried to file it off) can't marr my pride in this little number.


In a few days, I'll be doing a similar update for my 15mm Bad Landing campaign setting. I've some scenery and some miniatures to show off -as well as a revised "Encyclopedia Galaxia" entry for the Colony.

Sunday, 12 February 2012

Post Apocalypse Terrain WIP

Ah the wonders of Poundland! Here's some Work in Progress and Work not-yet-started shots of some terrain acquisitions for Aftermath: Post Apocalyptic Skirmishing.

 This first one here is a die-cast car that's nearly finished. The whole car was first sprayed with Matte Varnish (including the windows, to help acquire that grimy look abandoned car windows have). It was then heavily dry brushed with a dusty brown paint (Vallejo English Uniform). Scratch marks are black highlighted with chainmail. The car was then given a wash of black ink. The spray-on-varnish used earlier helped the ink adhere to the surface of the windows, darkening them further.

I then added some more scratch marks and dents (to represent more recent damage) and screwed the tip of a sharp knife into the windows to make bullet holes. If I'd wanted older bullet holes, I'd have done this before the ink wash. I'll also be adding rust later. In order to capture the feeling that this car has been abandoned for a while, I'll be creating a base for it in the form of a sand drift. The car won't be fixed in place however. I want to be able to use it for modern-period gaming as well as Post-Apocalypse.

 Next up, we have my favourite and least favourite acquisitions side by side. The bus is exactly 28mm scale. The large JCB, obviously, isn't. Both of these vehicles will need full re-paints (unlike the die-casts) after the decals are removed. Like the car above, they'll have removable bases so they can be used as both stationary terrain pieces and working vehicles.


This die-cast civilian car has had it's matte-spray but otherwise hasn't been touched. I made a stupid error on the police car in my over-eagerness: I removed the windows before spraying. Unlike the other vehicles seen here, the Police 4x4 will be an actual dedicated gaming piece rather than doing double duty as terrain. It's an ideal road-warrior car. I'm going to pintle-mount an M60 on the hood (bonnet if you're British like me) for a gunner and close up the empty window spaces with wire mesh before painting.

Lastly, two trucks. The look pretty good here side by side but when placed near the bus it becomes fairly clear that they are closer to 25mm than 28mm in scale. Still, they'll do the job well enough as scenery pieces. Unlike the other toys featured here, I doubt I'll ever be able to use these as functional vehicles because of the scale imbalance.

For more PA-ish miniatures, take a look at my Lead Legion blog. I've just put up a painted test-batch of 28mm zombies.